Introduction
In the first article, we built a modern CI pipeline for a Hugo site using GitHub Actions. Then, in the second article, we enhanced it with dynamic security testing using OWASP ZAP, adding a runtime security gate to prevent high-severity vulnerabilities from reaching production.
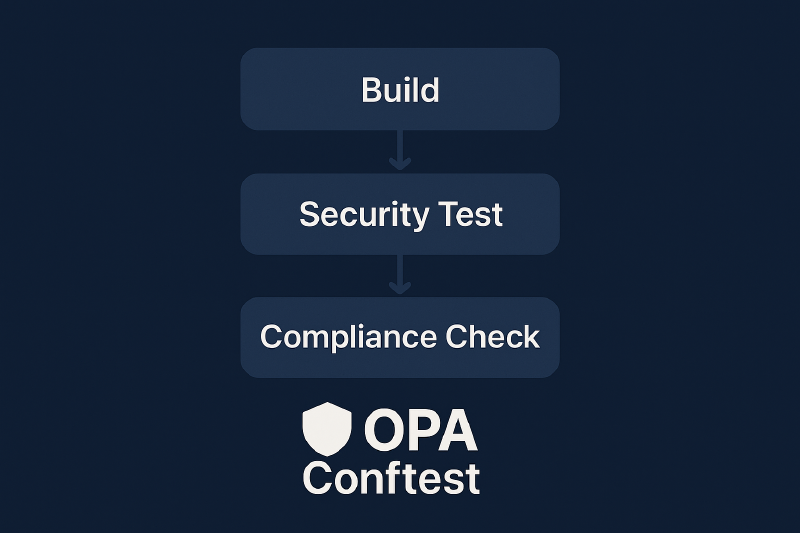
Now, we take the next step in our DevSecOps journey by introducing Policy-as-Code: a method to enforce compliance and governance rules directly within our pipeline using Open Policy Agent (OPA) and Conftest.
Enterprise CI/CD systems often need more than just security scans. They enforce internal policies, like checking for mandatory headers, metadata, or configuration patterns. With Conftest, we codify those rules and run them locally in CI, without relying on external services.
In this article, we:
-
Define lightweight
.regorules (e.g. “Referrer-Policymust exist”) -
Extract headers or site metadata using
curlorhttpie -
Convert the data to JSON and run
conftestagainst it -
Fail the pipeline if any policy is violated
This approach ensures that compliance is not just a checklist, but an automated and enforced part of your deployment lifecycle, a core principle of DevSecOps, and reflects how real-world engineering teams enforce internal technical standards early and automatically in their software lifecycle.
This article continues from the previous two. Make sure you have a working CI pipeline and dynamic scan stage before proceeding. No external OPA installation is required, everything runs as a local CI job.
What is Conftest?
Conftest is a lightweight command-line tool that uses OPA to test structured files (JSON/YAML) against policies. Unlike OWASP ZAP, it doesn’t scan the live application but rather enforces structure-level compliance.
It is often used to validate:
-
Kubernetes YAMLs
-
Terraform configs
-
Dockerfiles
-
And in this case, static site headers or metadata
It runs completely locally and therefore doesn’t make network request, making it ideal for early-stage CI enforcement.
Pipeline Enhacement: Compliance Check Stage in the Pipeline (Post-ZAP)
To operationalize our Policy-as-Code strategy, we’ll now extend the existing GitHub Actions workflow by adding a new compliance job. This stage runs after the live preview is built, and performs the following tasks:
| Step | Description |
|---|---|
| Define Policies | Use .rego files to declare simple rules like: “The Referrer-Policy header must exist”, or “Homepage must have a <title> tag”. |
| Extract Input Data | Use tools like curl or httpie to make a request to the preview site and extract the relevant data (headers, body). |
| Convert to JSON or YAML | Save the data as site.json, which becomes input for Conftest. |
| Run Conftest Locally | Use conftest to test the input against your .rego policies, locally and without hitting any external services. |
| Fail on Policy Violation | If any policy fails, the pipeline blocks the merge, just like a governance gate in enterprise CI pipelines. |
This stage acts as a compliance gate, complementing the quality and security gates already implemented in previous articles.
In the next section, we’ll walk through the actual implementation in GitHub Actions using a dedicated job to fetch headers, validate them, and stop the pipeline if any check fails. This completes the full DevSecOps flow:
Build Quality → Security Scan → Compliance Enforcement
GitHub Actions Implementation
Step 1 — Extend Your ci.yml with a Compliance Job
First, you’ll define a new job called conftest-check after the OWASP ZAP stage to your existing ci.yml:
|
|
-
checkout code- Retrieves the repository so we can access the Hugo output and
.regopolicy files
- Retrieves the repository so we can access the Hugo output and
-
Start Hugo preview with Nginx- Serves the static site locally at
http://localhost:8080so we can inspect headers
- Serves the static site locally at
-
Install Conftest- Downloads the latest Conftest binary and installs it into the runner environment
-
Extract headers using curl- Uses
curlandawkto convert HTTP response headers into structured JSON.
- Uses
-
Run Conftest policies- Validates the extracted headers against defined
.regorules. Fails on violations.
- Validates the extracted headers against defined
With the compliance job running in CI, let’s now look at how to organize and maintain your .rego policies for clarity, scalability, and reuse across projects.
Step 2 — Write Your .rego Policies
Policies live under a policy/ directory (default for Conftest).
Example: Check for Referrer-Policy header policy/headers.rego:
|
|
Command in CI:
|
|
➡️ This checks that the required header is present in the JSON structure extracted earlier.
If the header is present, the test passes. If not, the pipeline fails and the PR is blocked.
Step 3 — Input File Generation (Handled Automatically in CI)
In our workflow, we use curl and some lightweight shell scripting to fetch the site’s headers and convert them into a structured file called site_headers.json. This file wraps the headers under a headers key and serves as input for Conftest policy checks.
|
|
You don’t need to generate this file manually as it’s created automatically in your GitHub Actions pipeline before the policy check step.
Step 4 — Test Your Policies Locally Before CI
To ensure your .rego works properly, you can write unit tests using OPA’s native test framework.
Create a separate headers_test.rego file next to your policy:
|
|
Then run:
|
|
Benefits of Testing
.regoPolicies
- Validates that rules catch what they should (and only what they should)
- Prevents accidental rule breakage as you update logic
- Enables test-driven development (TDD) for compliance rules
Step 5 — Customize Policy Output (Optional)
You can customize the failure message for easier CI debugging:
|
|
Step 6 — Upload Results as GitHub Artifacts (Optional)
Just like ZAP, you can upload the site_headers.json used for debugging.
Just add this at the end of your conftest-check job:
uses: actions/upload-artifact@v4 with: name: site-headers-json path: site_headers.json
|
|